


INSTRUCTIONS FOR USE AND WARRANTY
1. SPRAY APPLICATION
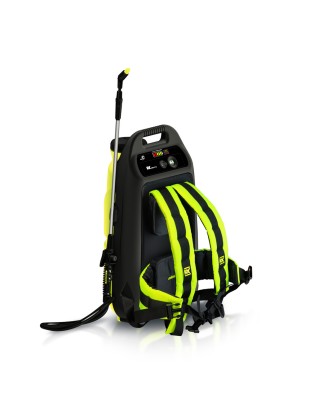
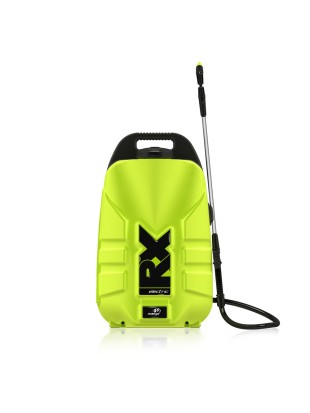
The RX cordless backpack sprayer is designed for spraying pesticides and liquid fertilizers in gardens, orchards, parks, forests and greenhouses.
2. STANDARD EQUIPMENT
Each RX cordless backpack sprayer package includes:
• complete sprayer with belt, pump and 7.2Ah battery
• 170 cm hose with supply valve integrated with handle R020j
• Telescopic spear with adjustable nozzle MRI.5 Ø 1.5mm, spray angle 45
• battery charger
• funnel with sieve
• adjustable conical nozzle MRI.0 Ø 1.0mm, spray angle 45
• flatstreem nozzle (for herbicides) MF3, 110, Ø 3mm, spraying angle 110
• seals, silicone lubricant vial and other parts
• instructions for use and warranty card
3. BATTERY CHARGING
To charge the battery, plug the supplied charger into the charging socket on the control panel, and then connect the 230V 50Hz power supply.
The battery is fully charged when all LED charging indicators and 100% control are illuminated.
If the battery has a low charge level and the LED is red, the battery must be charged before continuing.
Only charge the battery when the sprayer is switched off!
You can only finish charging the battery when it is fully charged. It is necessary to check the condition of the battery every three months and recharge it if necessary, if we do not want it to be completely discharged, which can cause damage.
4. PREPARATION AND INSTRUCTIONS FOR USE
Preparation for work
• Remove the sprayer from the box
• Connect the spears to the supply valve integrated with the R020j handle
• Open the RP I I cap and fill the sprayer with clean water to check the operation of the device
• Press the button on the control panel, and then press the shutter button on the handle
• If the sprayer is running and the battery is charged enough to work, then we can get ready to work
• The battery status is displayed on the control panel
• Prepare the liquid in a separate container according to the recommendations on the pesticide packaging
• Pour the liquid into the container, using a sieve and funnel RP22
Sprayer operation
• turn on the spray button on the control panel / Note: Before placing the sprayer on the back, the power button on the control panel must be switched on
• after turning the sprayer on its back, adjust the length of the braces, then tighten the belts on the chest and hips
• While holding the handle of the spear, press the trigger and start spraying
• During the operation of the sprayer, the pump will automatically establish constant pressure
• If the battery is discharged during spraying, the device will warn you with a light and sound signal.
• After spraying, rinse the sprayer with clean water. To do this, pour clean water into the container and spray until the device absorbs water from the container and begins to suck in air. Then turn off the sprayer and completely empty the water tank
NOTE: When you have finished working, make sure that the battery is sufficiently charged to store the device (store it with a charged battery) and that you need to make sure the dispenser is turned off.
Recommendations for use
• Do not store the sprayer exposed to sunlight or temperatures below + 4 ° C
• It is not recommended to fill the container above the working capacity
• Do not set the sprayer aside during operation, as this may cause air to be pumped out of the container.
• If you notice an increased resistance in the supply valve, lubricate the seals with silicone lubricant, otherwise this can lead to damage
• When working with plant protection chemicals, it is very important to follow the safety rules and strictly follow the instructions written on the back of the package.
• Leaving some liquid in the container over the winter can damage the valve and handle
5. EQUIPMENT MAINTENANCE
After finishing work, after cleaning the sprayer, you must:
• unscrew the hose screwed to the handle, remove the R40 filter and wash it (preferably under running water)
• unscrew the lower nut R50 from the supply valve, remove the piston valve with a spring, clean it, lubricate it with silicone lubricant and install it back on the supply valve and retighten the nut
• unscrew the yellow nozzle cover R I I 5 and then unscrew the black nozzle nut R64, take out the nozzle core, wash it, lubricate the O-ring in the core and reassemble it
• Unscrew the lid of the tank RP I I, take out the funnel RP22, remove the lid of the diaphragm tank R322 without removing it from the pipe, then take out the o-ring and clean it or replace the filter. When we are done with this, we need to install the filter and the o-ring back on the R322 cover. Then the R322 membrane container lid is inserted back into the container. When we do this, we need to make sure that the lid touches the bottom of the container
NOTE: All repairs, replacements, and maintenance of the pump, battery, or control panel may only be performed by Marolex premises or authorized service centers. In the event that all of these tasks performed elsewhere than specified will result in the loss of the warranty.
6. GENERAL COMMENTS
There is a filter (R40) in the handle, designed to prevent clogging of the nozzles.
